|
BLOG
|
We keep you informed throughout the year with poignant posts and informative articles.
|
 Thank you to all the M.E. families for attending STEAM night last Thursday. We hope you had a great time with your students enjoying a variety of science, tech, engineering, art, and math activities!
We are so thankful to our community organizations who provided their time and expertise: Snohomish PUD, Mathnasium, Orca Network, Sno-Isle Library, and Snohomish Conservation District. And of course, a huge thanks to all the volunteers who helped set up, cleanup, and run the activity stations. We couldn’t have done it without you! Here are some highlights from our Full STEAM Ahead Family Night 2023. Hope to see you again next year!!
ME PTSA is so excited that we were able to send home materials in the December supply drop for every student to build their own Flashlight or Book Light! A HUGE thank you to everyone who helped put together these materials and instructions!
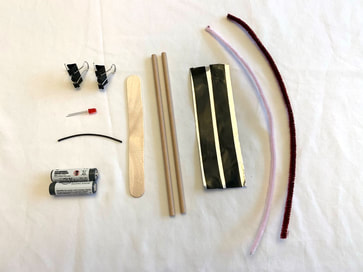
Supplies included:
- 1 Popsicle Stick - 2 Binder Clips - 2 Straws - 2 Pipe Cleaners - 1 LED - 1 Piece of Wire - 2 AA Batteries - 1 Piece of Foil Tape with two strips of Black Electrical Tape on it 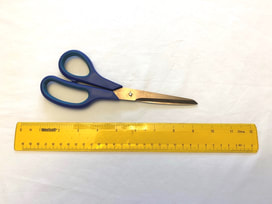
You will also need:
- Scissors - A Ruler - A Pen - A Grown-up Helper (optional but highly recommended!)
Before you begin:
1) Read instructions all the way through. 2) Clear a good workspace. You may need to take a break and come back later or tomorrow to finish. 3) Keep all parts and pieces away from small children and pets. They may pose choking hazards. 4) Don’t rush. It takes some patience, but it will pay off! 5) Measure twice, cut once. This is a great family activity with plenty of measuring practice Check out this great video tutorial for even more info on how to put this project together, or keep scrolling to read the instructions. You can even download another copy of the instructions, if you need to! All photos, videos, and instructional content are copyright ME PTSA 2020.
Part A: Build the Power Supply
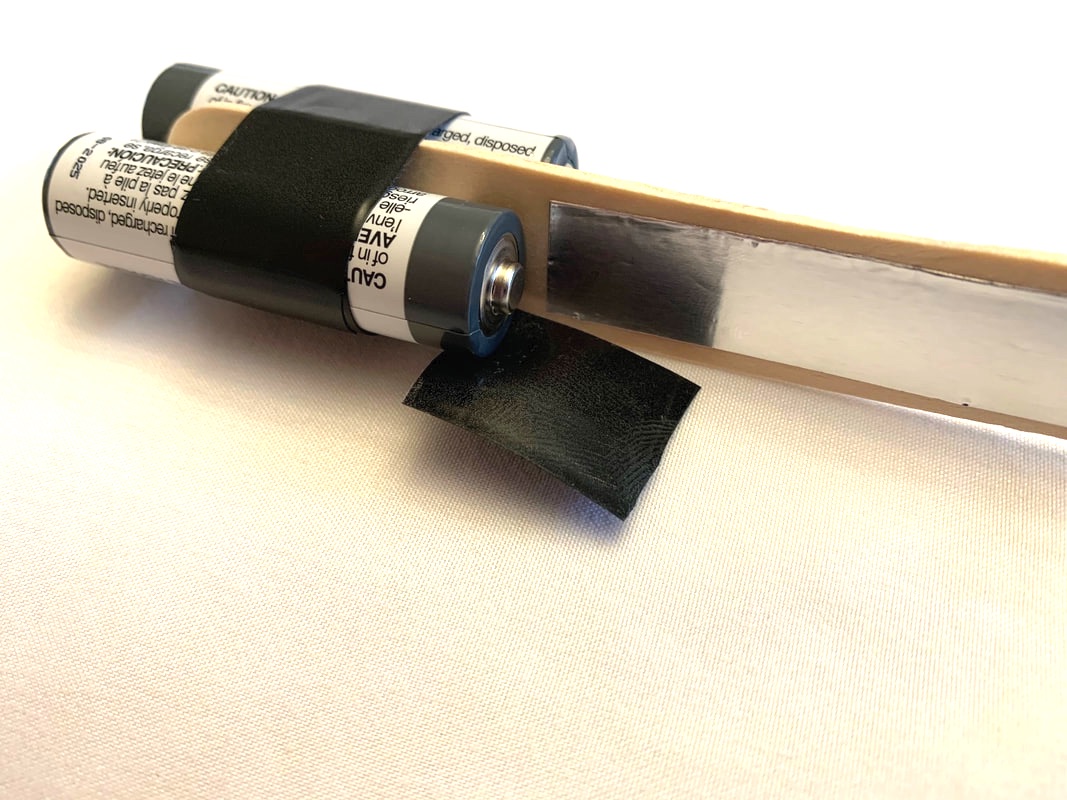
Supplies needed for this step: - 1 Popsicle Stick - 2 AA Batteries - Foil Tape with Black Electrical Tape - Wire Step 1) Set the batteries on a table or flat surface with the popsicle stick sandwiched in between. The batteries should overhang the end of the popsicle stick by ¼ inch. Batteries should be facing opposite directions with the “+” (bump side) and the “–“ (flat side) next to each other. 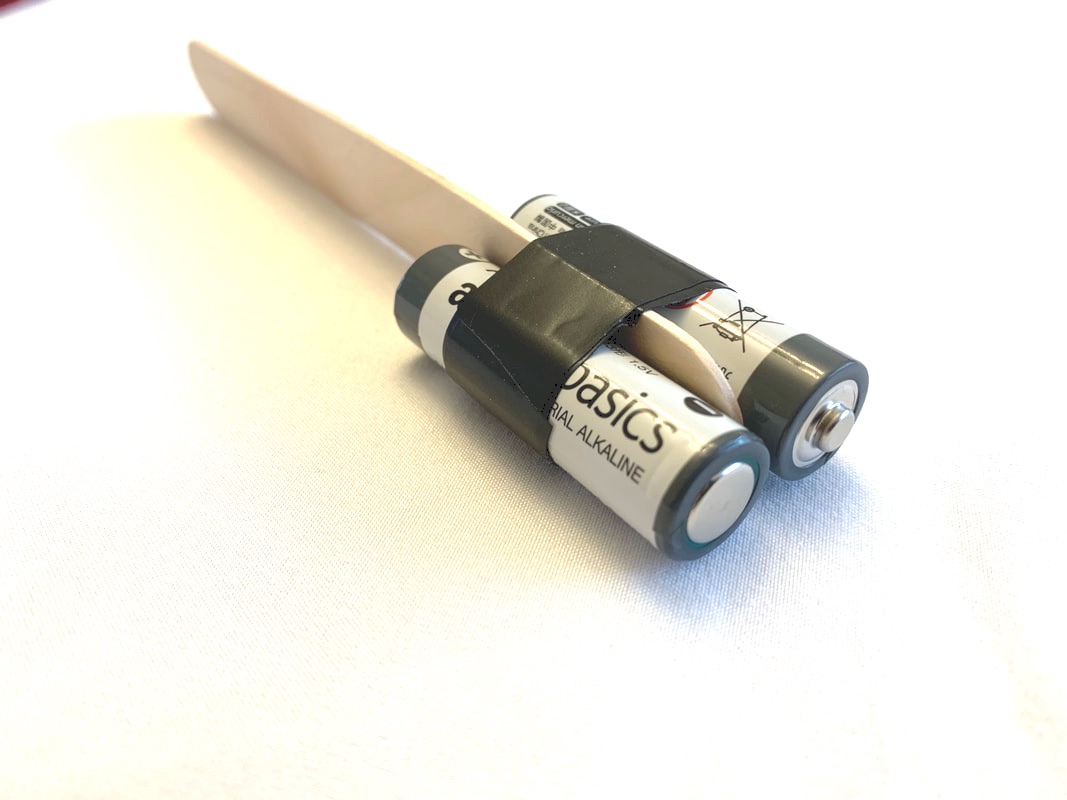
Step 2) This step is best performed with an extra set of hands from your grown-up helper. Carefully peel one strip of electrical tape off of the foil tape and tightly wrap it around the batteries and the popsicle stick to hold them in place. It is important that the ends of the batteries are overhanging the stick and facing the proper direction. Check one last time before you put the tape on!
Step 3) We need to make a switch for your light (don’t worry, it will make sense shortly!). Carefully peel the remaining electrical tape from the foil tape. Cut a 1¼-inch piece of electrical tape (you can use the 1¼-inch binder clip to measure the tape) and put it inside of the binder clip so that it wraps around the clamping surface. Once that piece is stuck to the inside of the binder clip on one side, repeat the process and cut another 1 inch piece of tape to line the other inside surface of the clip. You might need a grown-up to open the clip to press the tape down. Set aside the extra electrical tape (sticky-side up) for later.
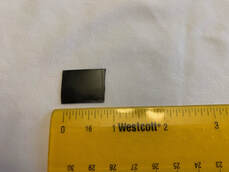
Step 4) Now it’s time to cut the foil tape. Don’t peel it off of the backing until all cuts are complete and you are at step 8. Cut it cross-wise so that you have a piece 3¾ inches long.
Step 5) Take that same piece and cut two long strips that are 3¾ inches long by ½ inch wide. They should be a little narrower than your popsicle stick.
There is a picture of all of the foil tape measurements and cuts drawn on the last page of your packet. You can follow the directions and measure and cut as you go, or you can use the drawing to measure and draw all of your cut lines on the back of the tape right now. Take your time and measure carefully!
Step 6) We are going to use pieces of foil tape to conduct electricity from the batteries. It is VERY IMPORTANT that the foil tape does not overlap the edge and touch at the narrow top or bottom of the stick. You are going to carefully remove the paper backing from the ½-inch strip foil tape, and line it up along the center length of the stick. Once it is in the center of the popsicle stick and almost at the edge of the battery, you are going to press it down to stick. (Grown-up helper pro-tip: it’s easy to start separating the backing by brushing your finger along the corner edge and bending the foil slightly)

Step 7) Repeat this step on the other side of the popsicle stick with the other ½-inch wide strip of foil tape. Now both sides of the popsicle stick should have a strip of foil tape on it.
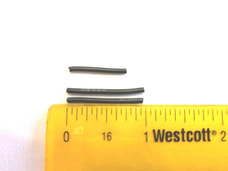
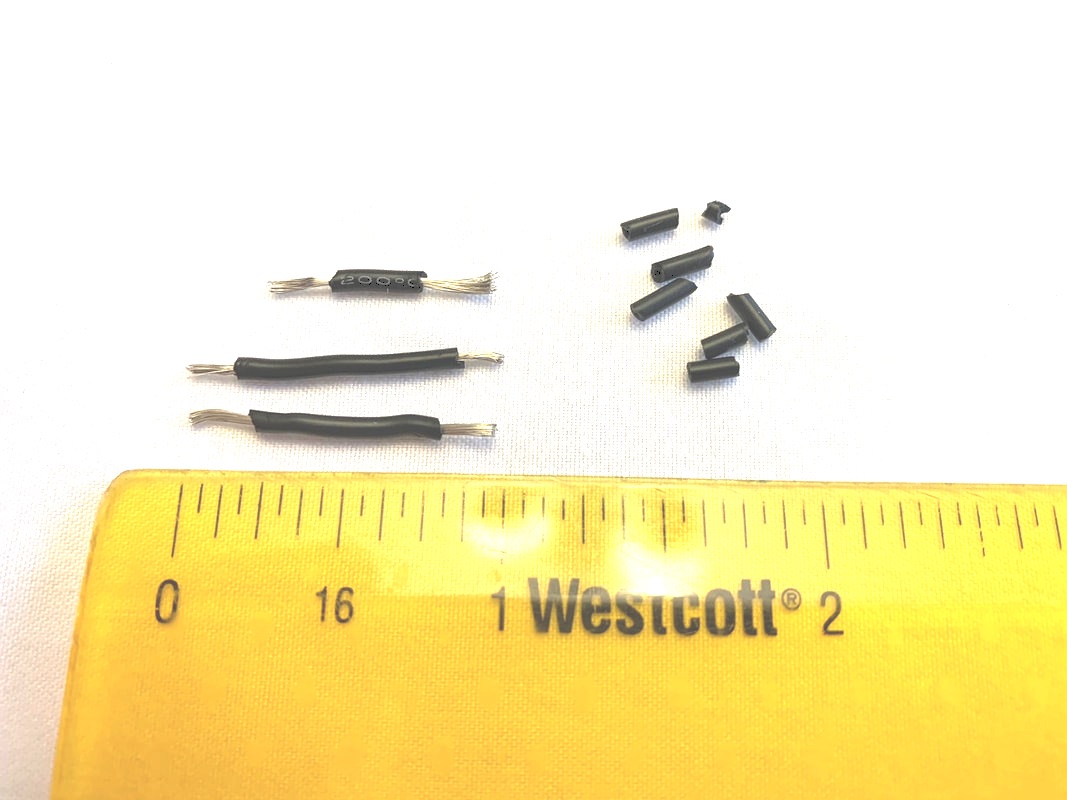
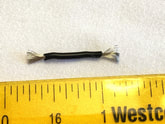
Step 8) Cut the black wire into 2 pieces that are each 1-inch long, and 1 piece that is ¾-inch long with scissors. There may be a tiny bit of extra wire – set it aside or discard.
Step 9) We need to strip the jacket off of the ends of the wire to expose the metal conductor in the middle. The wire in your kit was specifically chosen so that the jacket can be removed by hand with fingernails. No sharp tools are required. Look at the ruler and get an idea of how far ¼ inch is. Pinch the wire between your pointer finger and thumbnail and pull off the plastic jacket. Do this to both ends of all three wires. If you are having trouble ask a grown-up to help with this part.
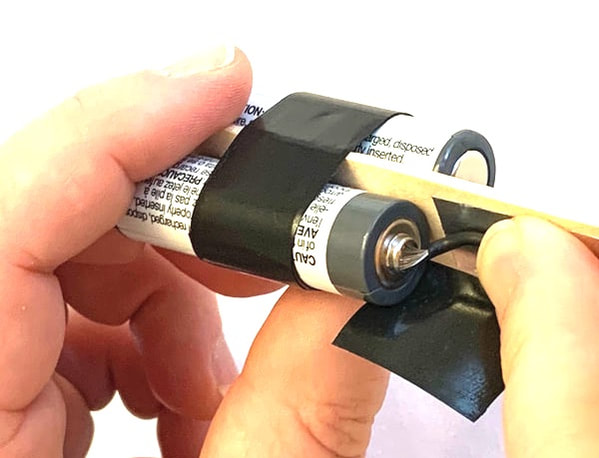
Step 10) Cut a ¾-inch piece of electrical tape and stick it to the positive “+”side of the battery (bump side) that is facing the longer side of the popsicle stick. Most of the sticky part of the tape should be pointed up in the air. We are going to use this to hold a wire onto the battery.
Step 11) Use your finger and fan out the conductor (the metal strands) of the 1-inch wire so that they are about as wide as the bump on the positive “+” side of the battery where you put the electrical tape. Bend the wire just a little so that you can tape the conductors to the battery with the tape. Be careful and take your time. Once the tape is over the wire, use your finger and be sure the tape is pressed firmly against the battery with no gaps.
Step 12)
You will need to cut some strips of foil tape to hold the other wire ends. You should have two pieces of foil tape remaining. Use the long piece (it should be about 3¾-inches long by ¾-inch wide) and cut it so that you have a piece 1½-inches long by ¾-inch wide, and three smaller pieces that are ½-inch long by ¾-inch wide.
Step 13) Use your finger and gently fan out the conductor on both sides of another piece of 1-inch wire that you previously stripped. We are going to connect the other battery to the foil tape on the popsicle stick. The easiest way to do this is to fan out the conductors, stick one of the conductors to a 1/2-inch piece of foil tape that you just cut, bend the conductors and tape out (creating a corner of the wire) and then stick the tape and wire to the negative side of the battery. Press the foil tape down around the sides of the battery so the conductors are completely covered and attached.
Step 14) Carefully peel the backing off of one of the ½-inch pieces of foil tape and stick it over the remaining conductors of the wire we just placed on the battery, so that the conductors are completely covered and attached to the foil tape on the popsicle stick.
Step 15) Now we’re going to do the same thing on the other side of the popsicle stick with the remaining ½-inch piece of foil tape. Stick it over the remaining conductors of the wire so that the conductors are completely covered and attached to the foil tape on the popsicle stick.
Step 16) Take the remaining piece of ¾-inch wire. Fan out the conductors on both sides. Lay the wire on top of the sticky side of the 1½-inch foil tape. This wire is going on the end of the flashlight or book light and will connect the batteries together in series. Make one fanned wire touch the bump of the positive “+” battery and the other side touch the negative “-” of the other battery. Use the foil tape to secure the wire ends and press it securely to the batteries.
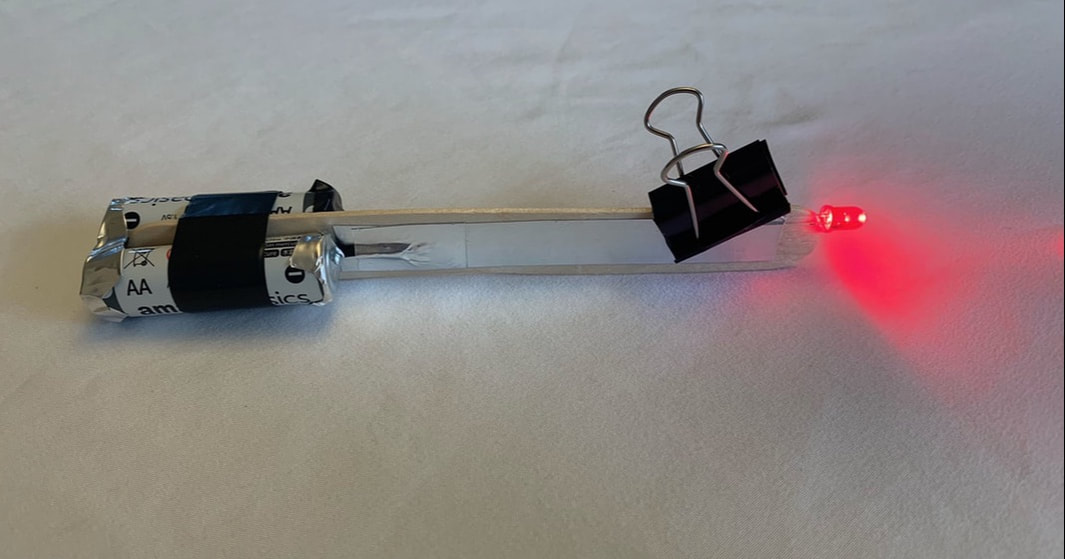
Step 17) Test your circuit! Take the LED and notice that the conductors are different lengths – one side is longer than the other. It will only produce light if the longer conductor is contacting the foil tape on the same side as the positive “+” side of the battery (the bump with black electrical tape). You can try it in both directions to see. Carefully slide the LED conductors around the sides of the popsicle stick (without bending them!) so that they are touching the foil tape on each side. If you do this carefully, the LED will stay lit. If it lights up, congratulations – your circuit is ready for the next step! If it doesn’t light up, try flipping it over to make sure the longer conductor is on the correct side. Now you get to choose whether to make it into a book light or a flashlight!
Part B: Flashlight
(an easier option for younger students) If you want to make the flashlight, place the LED on the end of the popsicle stick so the conductors are correctly placed (longer conductor on the positive battery side with black electrical tape). Use the binder clip with electrical tape inside (the switch we made in Step 3) and clamp it over the side of the popsicle stick and ends of the LED conductors. When you want to turn off the flashlight, remove the clip and LED. 
Part C Book Light Option: Add the light stem
Step 1) Take one drinking straw and one pipe cleaner, and place the pipe cleaner inside the straw so that one end is flush with the end of the straw. Measure and cut so that ¾ inch of pipe cleaner is hanging out of the other end of the straw. Discard the extra or save for another use. Repeat with the other pipe cleaner. Remove the pipe cleaners from the straws and set aside. 
Step 2) Pick up one drinking straw and cut two 2-inch pieces. The remaining piece should be 3¾ inches if you measured correctly. Set all three pieces aside and cut the second straw to the same lengths. Pro-tip: If the cut ends of the straw get a little crushed while cutting, gently squeeze them back open (or use the tip of a pen or pencil inside the ends to round them back out), being careful not to bend them too much. Extra sharp scissors will make nicer cuts.
Step 3) Remember how we stripped the wires to expose the conductors? We’re going to do the same thing with pipe cleaners so they will be conductors too! Using your fingers, pull the fuzz from about ¾ inch of each end of both pipe cleaners.
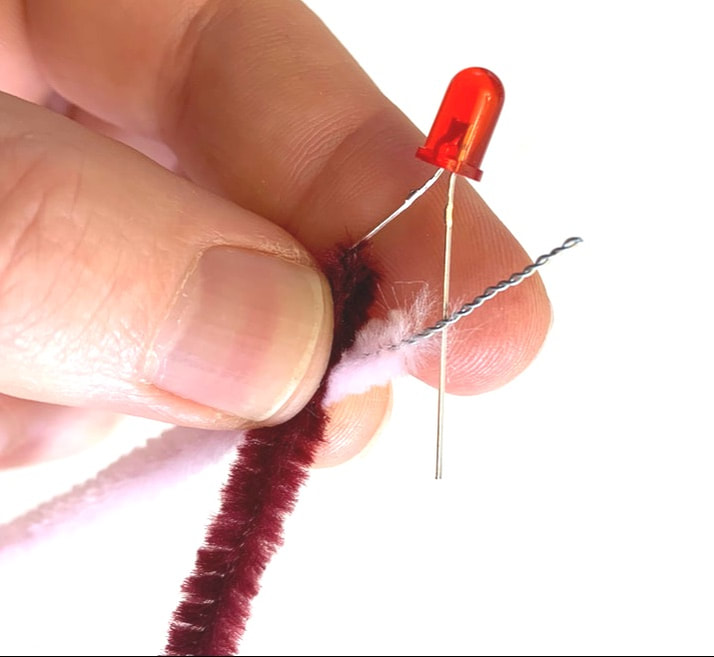
Step 4) Now we’re going to connect the LED light to the conductors. Gently split the LED conductors slightly apart so you can work with one at a time, but be careful not to bend them back and forth too much or they will break. Lay one of the pipe cleaner conductors across one of the LED conductors. Pinching below the cross with two fingers, twist the two ends tightly together with your other hand, until the ends are completely twisted up. Then gently fold the twisted ends back down along the length of the pipe cleaner. This is going to go inside the straw.
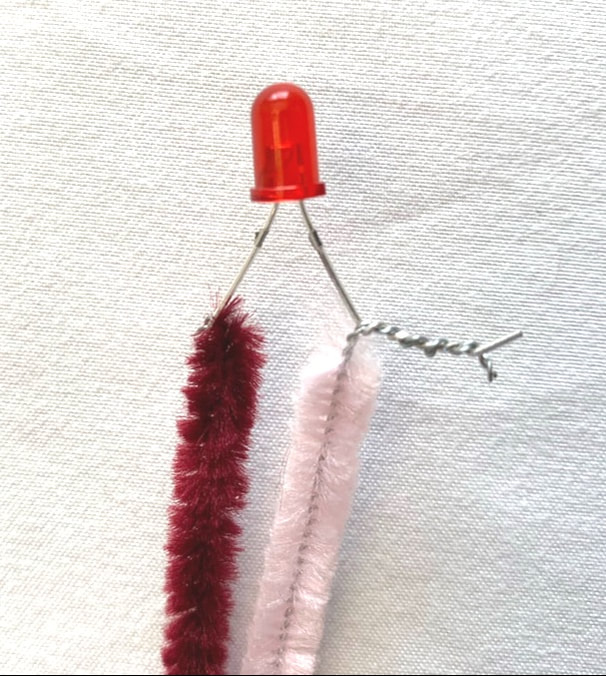
Step 5) Carefully attach the other pipe cleaner to the LED in the same way. Lay the pipe cleaner conductor across the remaining LED conductor. Pinching below the cross with two fingers, twist the two ends tightly together with your other hand, until the ends are completely twisted up. Then gently fold the twisted ends back down along the length of the pipe cleaner. The pipe cleaners should look symmetrical now and be the same length.
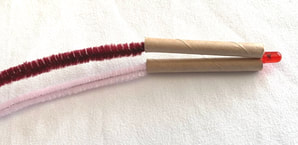
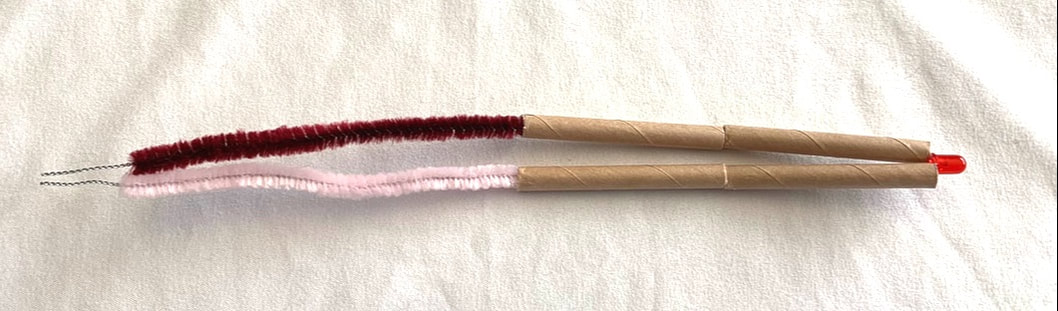
Step 6) Take two of the 2-inch pieces of straw, and put one on each pipe cleaner. Slide the straw pieces all the way up to the LED. Then take two more pieces of 2-inch straw lengths and put one on each pipe cleaner. Slide the straw pieces up to meet the other straw pieces. Take the remaining two pieces of straw and put one on each pipe cleaner so that all of the pipe cleaner fuzz is covered.
Step 7) Cut four strips of foil tape that are ½-inch wide and 2 ¼-inch long. Peel the backing from one strip of foil tape and wrap it around one section of straw pieces to hold them together side-by-side. Do the same thing with the other three pieces of tape we just cut and the other two sections of straws. The longest section of straws should get two pieces of tape, with some space between them.
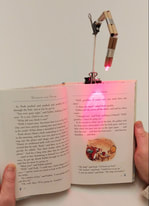
Step 8) The remaining piece of foil tape should be 1 inch wide by 2 inches long. Cut it in half lengthwise so that each piece is ½ inch wide by 2 inches long. Take the binder clip that does not have electrical tape inside and lay it flat on the table. Have your grown-up helper hold the clip open while you place the remaining pieces of foil tape centered along one inside side of the clip (so the tape ends meet in the middle of the clip). Pick up the clip and place it tape-side against the flat side of the side-by-side batteries on the popsicle stick. Make sure the clip is on the side that places the black-taped battery to the right, as in the photo below. (You’ll understand why later, when you go to clip it onto your book) Wrap the tape tightly around the batteries to hold the clip on. This will clip your light on to the cover of your book.
Step 9) Pick up the straws and gently bend the pipe cleaner conductor wires sticking out of the bottom so that they are perpendicular (or making a right angle) to the straws. Make sure that the straws are pushed all the way up to the LED before you bend the wires. You can also slightly bend the pipe cleaners at the straw joints (bend them in the same direction as the conductor wires), or wait until you attach it to your book.
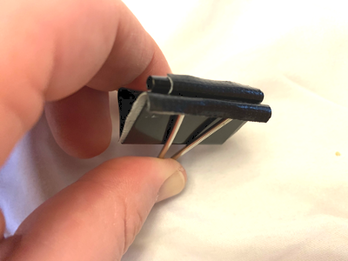
Step 10) Take the remaining binder clip (the switch that we made in Part A Step 3) and clip it around the base of the straws without the LED, with the conductor wires slightly sticking out of the clamped side. To turn the light on, clip on to the popsicle stick so that the conductors from the pipe cleaners are touching both sides of the foil tape on the popsicle stick (one on each side). Push the popsicle stick tightly between the straw bottoms for a better fit. Does it light up? If not, flip it around to the other side of the popsicle stick. To turn off the light, move the clip just enough so the conductors are not touching the foil tape.
Congratulations! You made your very own book light! Now go find your favorite book and have fun reading through these long dark days of winter!
The ME PTSA is so glad that we were able to send home some fun Fall-time STEAM activities to every student at this month's supply pick-up, including a mini pumpkin! Your supply bag should have a packet of purple paper with a PTSA green front page of instructions, and a little bag of supplies. Read on for more info on how to use these supplies to put together a catapult perfect for launching a little pom-pom pumpkin and how to build a foldable paper house! You can choose to dress up your pumpkin for the Storybook Pumpkin Parade, or paint or decorate it however you want, or just use it for a festive fall decoration at your house or your desk!  Want to share your pumpkin in the Storybook Pumpkin Parade? Get all the info here! 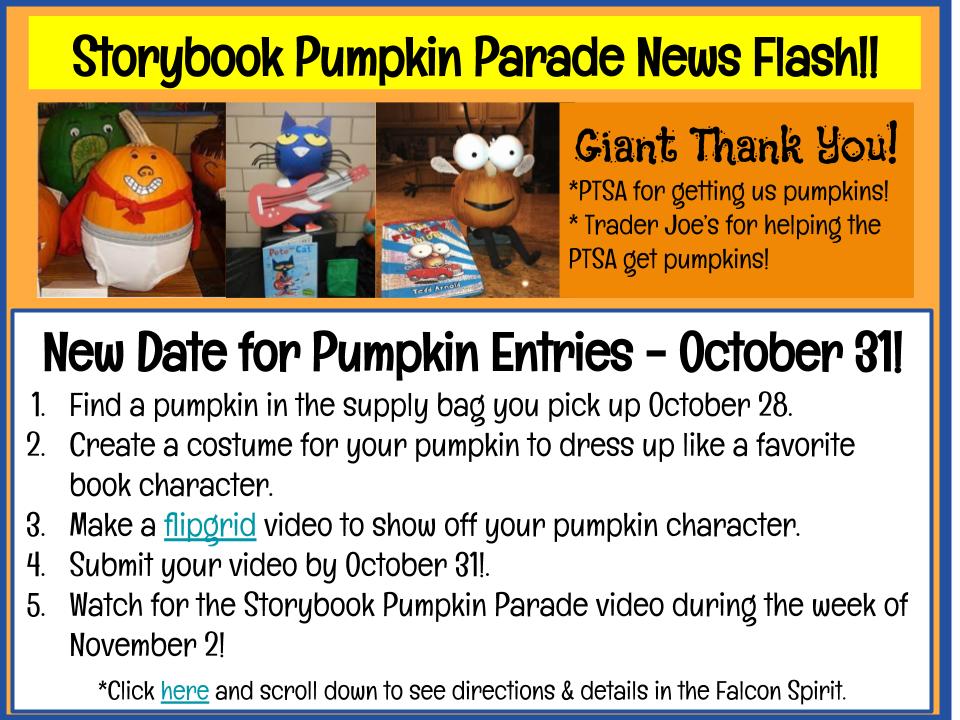 Craft Stick Catapult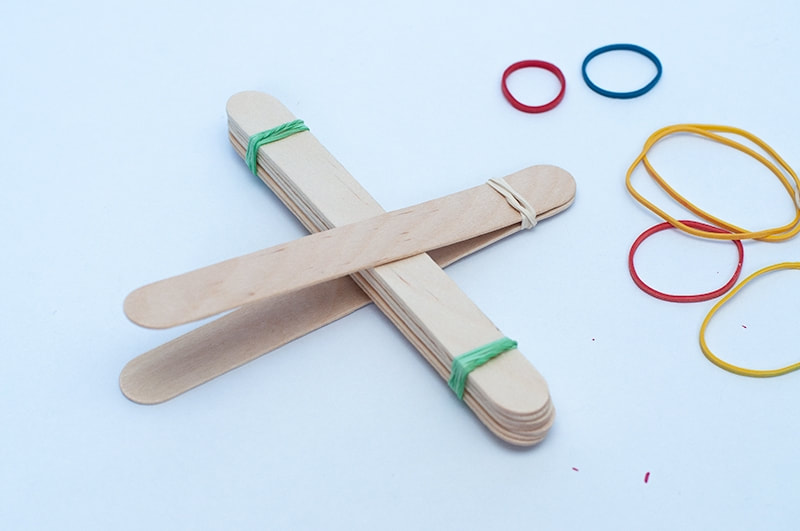 Need more help to figure out how to build your craft stick catapult? Or maybe you want to make it even more awesome? Check out these great sites with photos and videos and ideas! Basic Catapult video tutorial Darice Blog: DIY Catapult photo tutorial Little Bins For Little Hands Blog: Popsicle Stick Catapult Video Tutorial - catapult with plastic spoon Foldable Paper House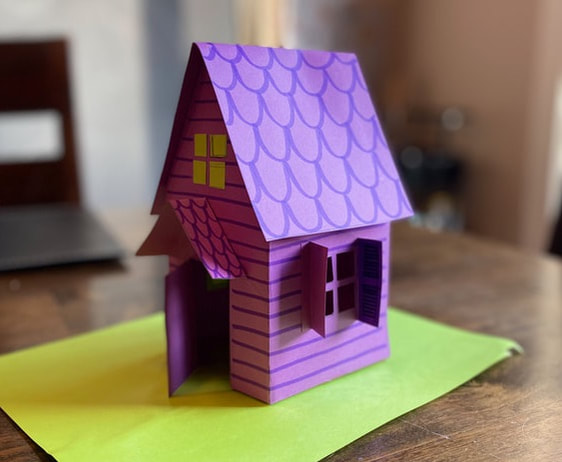 Your packet of papers from the ME PTSA includes blueprints to build this cool house, engineered by Delia over at Delia Creates. You can make this house as spooky or as sweet as you would like - and you can even print more pages to color and build more houses to decorate for the Halloween or Winter seasons, or just for playtime! Click here to print more house blueprints, including a special bonus piece (see if you can figure out what it is!). You can print these on to plain white paper and color right on them, or use the pieces as patterns or templates to cut out of different kinds of paper, like card stock or construction paper. We can't wait to see what you make! You can send photos of your creations to us at [email protected], and we'll share them on our Instagram and Facebook pages! Check out Delia's great blog for so many more ideas and projects, including more printables, and inspiration for Halloween and winter houses! Need even more spooky crafts? Cut out your own cloud of bats, or make your own twisty trees out of wire or pipe cleaners and paper! Ready to build? Check out the simple instructions below (click here for a link you can pause!), and scroll down for full video instructions!  Need even more info or ideas? Watch a video with tips on coloring, and another video with info on how to build your house! Color Your Foldable House!Build Your Foldable House! |
Categories
All
Archives
April 2024
|


 RSS Feed
