|
BLOG
|
We keep you informed throughout the year with poignant posts and informative articles.
|
|
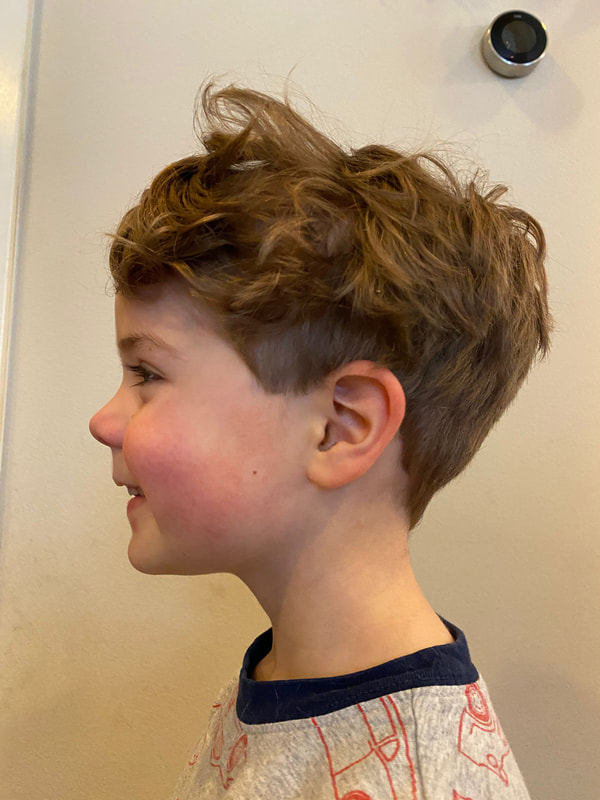
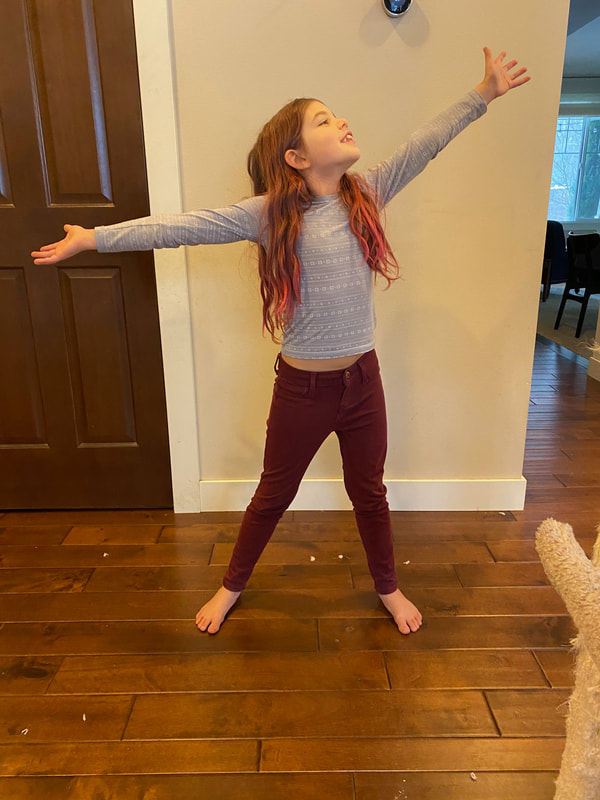
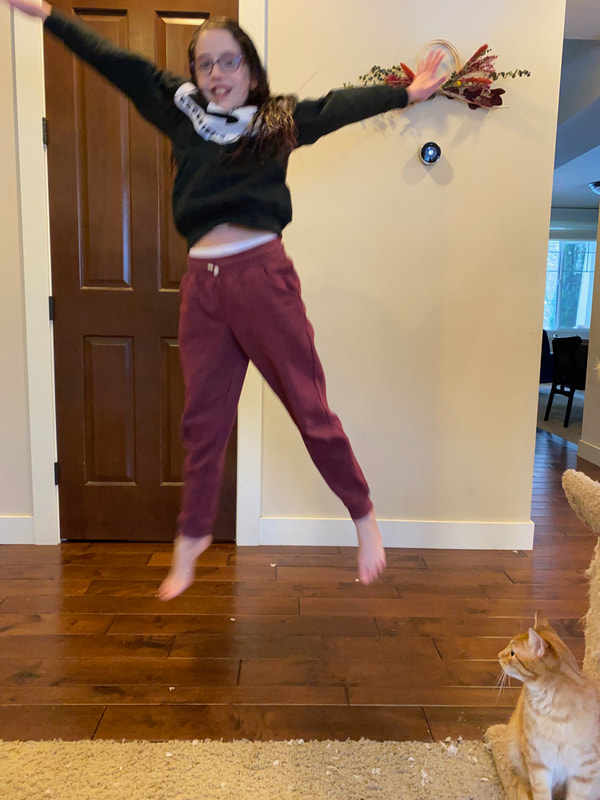
ME PTSA is partnering with Original Works to turn your student's original work of art into a custom keepsake. With tons of affordable products to choose from (starting at just $6!), you are sure to find something wonderful! These items make perfect gifts for Father's Day, birthdays, grandparents, and holidays. There are useful items for your artist and your home, as well as keepsakes to treasure. Visit originalworks.com/parents to learn more about the program! 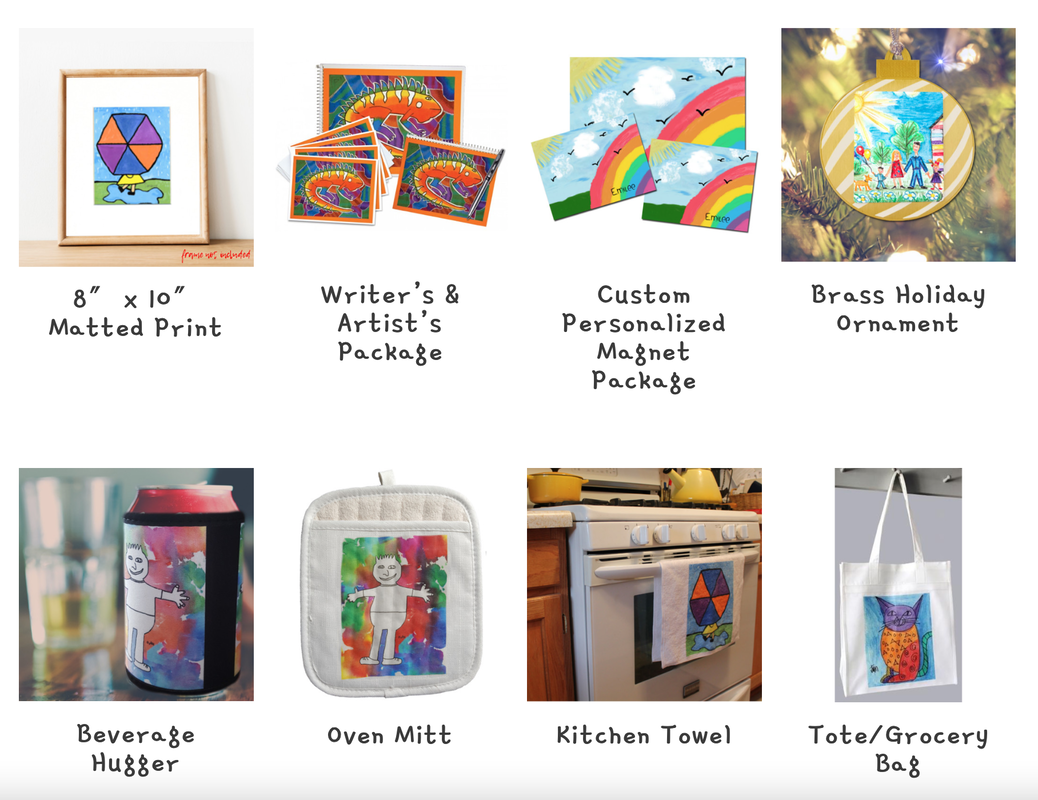 Here's how it will work: Your artist will receive a blank piece of art paper and the program flyer in the next supply pick-up. The flyer has all the information, including the rules (NO GLITTER!) and suggestions (RICH COLORS!) for making a great piece of art. On the back side of the flyer is a template and instructions to make a picture of our own Mukilteo Lighthouse. Your artist can use the directions on the flyer to complete the Lighthouse Project on their own, or they can check out our blog posts for the Lighthouse Project and the Self-Portrait Project (post & links coming soon - including video tutorials!), or they can attend a live Zoom art lesson with an art docent to complete the projects. You can RSVP here to receive the Zoom link (same link for all lessons), or your students can join from Schoology. Or they can do all of that! Your artist can make as many projects as they like, but you'll have to pick just one favorite to turn in - just remember that the paper you turn in needs to be a heavier weight card stock like the one we are sending home in supply bags. Finished artwork must be returned to school at the following supply pick-up at the beginning of May, or can be dropped off at the school office any time before that. Keep reading below for everything you need to know to make and return your student's art. We will share the ordering info in May, and you will be able to order online and have products delivered directly to you. ME PTSA will receive a portion of the profits from all products sold. We have created lessons for two projects that can be done with whatever materials you have at home, such as crayons, markers, watercolor or tempera/poster paint, tissue paper, printer paper, or heavier weight card stock or sulphite construction paper (cheaper quality construction paper will not reproduce true to color, it will look dull and gray-ish). GUIDELINES 1. Use the art paper provided. If you want to make or submit another project, use a heavier weight card stock paper, it should be 60-70# (for reference, regular printer paper is 20#). 2. Create a one-inch (1") border all the way around your paper. Fill the whole page with color, but keep all the most important parts, including signatures, inside the border. 3. On the BACK of the paper, use a PENCIL to write a letter 'T' at the top of the picture, and include the artist's name, grade, and teacher. DO NOT USE: Please do not use any of the following, or artwork will have to be returned unprocessed. 1. Newspaper or magazine pages 2. Stickers. 3. Trademarked or copyrighted images or logos, including brand names, emojis, video game or cartoon characters. 4. Fluorescent, brights, or metallic papers, paints, or materials. 5. GLITTER! Including sprinkled glitter as well as glitter crayons, markers, glue, and paint. Glitter ruins the scanning machines and will not be processed. 6. Abrasives such as salt or sand. 7. 3D items including cotton balls, feathers, yarn, foam, or google eyes. 8. Scratch art. 9. Poor quality construction paper (like this). 10. Oil pastel or chalk pastels. 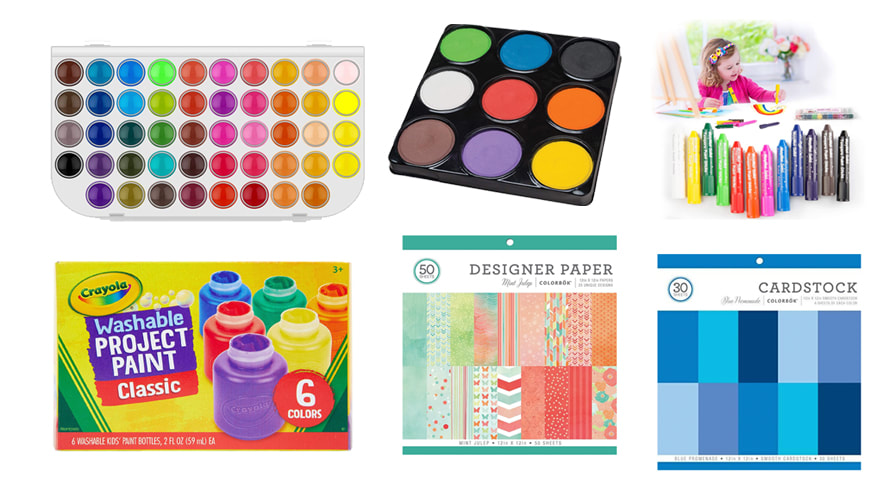 MATERIALS TO USE: Bright and bold colors will look best! If using paints, go easy on the water! 1. Crayons and colored pencils - press really hard to make a dark rich color! 2. Markers 3. Watercolors - just don't use too much water! 4. Tempera paints. 5. Photos 6. Paper collages - painted and colored printer paper or tissue paper works great! Other great collage materials include scrapbook/project paper, card stock, and sulphite paper. If you want to get some specific supplies ready, or need some new art materials at home, here are some products and ideas we recommend: - tempera cake paints or tempera sticks - liquid tempera or poster paint - watercolors (like this or this) - paper for collages (like tissue paper, scrapbook/project paper, card stock, and sulphite paper) - you can paint on this paper, too! - painted tissue paper. Take inspiration from Eric Carle's painting technique and paint some tissue paper ahead of time. Use tempera paint (but not too much, or your paper will rip!), and try using a variety of materials to create different textures. Experiment with painting with an old toothbrush, a sponge, pieces of carpet, plastic forks! Painted tissue paper makes beautiful collages, just like Eric Carle's books! Just make sure to give it a few days to dry before you use it. - For the self-portrait project, you may want to use some photographs of your artist! I took a few different photos of my artists, like a profile photo, a "proud" photo, a reaching for the stars photo, a star jump photo - check out our examples below. Your artist might have ideas about how they want to capture themselves, too! You can print the photos on your home printer (even black and white photos look cool!), or get them printed at a photo center like Walgreen's or Costco.
Stay tuned for updates and more information on Zoom lesson times and links to RSVP!
|
Categories
All
Archives
April 2024
|
 RSS Feed
